Introduction
ClamAV is a free, open-source anti-virus, originally developed for Unix/Linux (a Windows port is also available). In addition to being a very capable anti-virus, it also offers certain anti-spam features.
This guide provides step-by-step instructions for installing and configuring ClamAV anti-virus as an ORF External Agent . This is the first part of a two-part series and this part focuses on setting up ClamAV for virus filtering. The second part is dedicated to extending ClamAV with anti-phising and anti-spam capabitilies.
Setting up ClamAV with ORF
| 1 |
Getting Started - Downloading Required PackagesDownload the 'current stable' version of ClamAV Antivirus Native Win32 Port from http://oss.netfarm.it/clamav/ (as of writing this 0.101.2). You will also need 7zip to extract the archive contents. Download the ClamAV External Agent definition for ORF (this is required to connect ORF and ClamAV). |
| 2 |
Installing ClamAVExtract the contents of the directory residing in the .7z file to c:\clamav. The rest of the guide assumes you installated ClamAV to this folder. IMPORTANT If you install ClamAV to any directory other than the default (C:\clamav), you will have to manually edit the configuration files and registry entries after installation. To avoid this, we strongly recommend installing it to C:\clamav. To reinstall ClamAV, first run the following commands as Administrator to remove the previous installation: sc delete "FreshClam"sc delete "ClamD" rmdir /q /s "C:\clamav" |
| 3 |
Creating the FreshClam Service
ClamAV relies on two services: the first is the FreshClam service, which keeps the anti-virus
definitions up-to-date, the second is the ClamD service, which keeps the definitions
loaded, so files can be checked against them quickly by the command line tool clamdscan, which the External
Agent relies on. The configuration files of these services reside in c:\clamav by default and they are
called
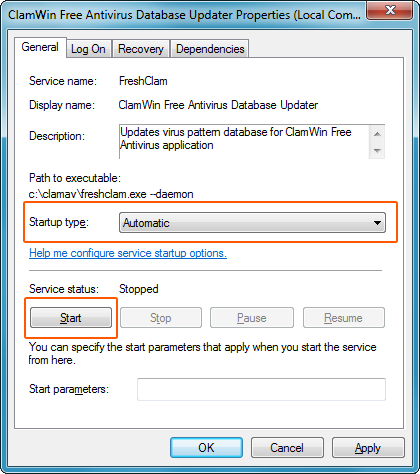
If outbound connections from the ORF box go through a proxy server, you should open HTTPProxyPort 3128 HTTPProxyUsername myusername HTTPProxyPassword mypass The update frequency is controlled by the following parameter: Checks 12Where 12 means the database is updated 12 times a days (in every two hours). This is the recommended value. Once you are done editing the file, create a sub-folder called "db" in c:\clamAV, then proceed with creating the Freshclam service by running the following command as Administrator from the ClamAV directory: freshclam --installYou should get a Service FreshClam successfully created message. Start the Services snap-in and configure the FreshClam Service (display name: ClamWin Free Antivirus Database Updater ) to start automatically. Finally, start the service: 
You can verify that definitions are downloaded and updated without problems by checking the contents of the c:\clamav\db directory. |
| 4 |
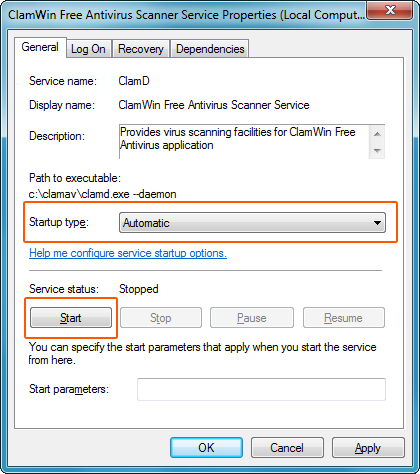
Creating the ClamD ServiceCreate the ClamD service by running the following command as Administrator from the ClamAV directory: clamd --installYou should get a Service ClamD successfully created message. Start the Services snap-in and configure the ClamD Service (display name: ClamWin Free Antivirus Scanner Service) to start automatically. Finally, start the service: 
|
| 5 |
Importing the External AgentClamAV can be attached to ORF using External Agents. The External Agent definition you downloaded describes how ORF can work with ClamAV. Import this definition by following the steps below:
To make sure the External Agents test is enabled and configured properly:
The definition is shipped with a few defaults, you may want to review these:
|
Wait, there is more!
ClamAV is now set up for virus protection with ORF on your system – but ClamAV can do more for you . Third-party signatures extend ClamAV with the ability to detect phising, scams and spam. The second part of this guide explains how to set up ClamAV for extended protection:
ClamAV Guide - Part II: Using ClamAV 3rd Party Signatures with ORF